As a professional home organizer, it won’t surprise you that I’m one of those people who always sees how something can be improved. lt’s one of the things that makes me great at my job, but it can also mean that I never see things at home as finished. There is ALWAYS an improvement to be made. So, that’s kind of how this project came about.
There’s this nook in our laundry room/pass-through from the garage. The nook was meant to house the pantry. Because you know, the laundry and pass-through room needed a third job. Hello house designer? At any rate, with nowhere else for a pantry, this nook served it’s purpose, and when we moved in five years ago, it had a cabinet there for that function. The cabinet was ok, and I was trying not to be picky but to be honest, it always bugged me that it didn’t fit in the nook just right. And the insides of the cabinet weren’t the best either. Don’t get me wrong, it wasn’t horrible, but it could be better.
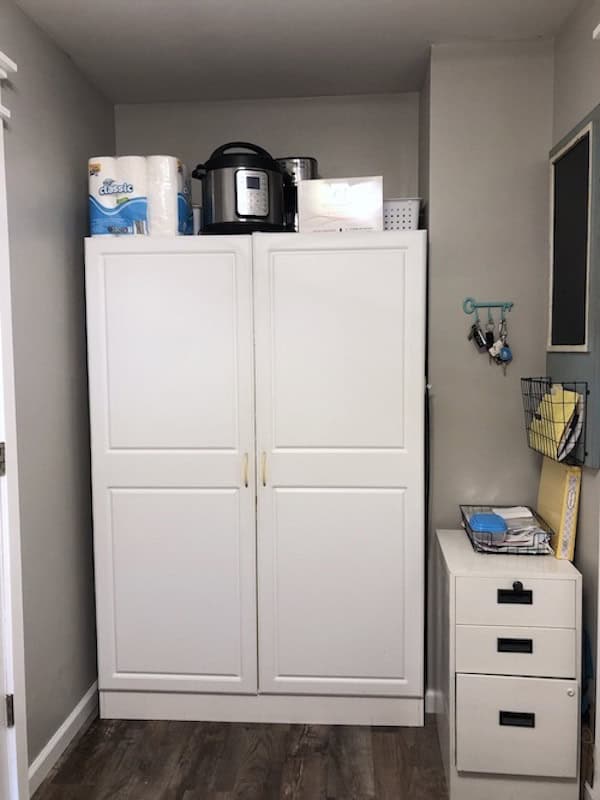
For five years, I thought about that space every time I used it and how I could improve it. I began wondering if we could build something that looked built-in. I also wanted the inside of the pantry to have drawers and adjustable shelving. Since I design and sell The Container Store’s Elfa system, this seemed like the perfect fit, but there were always more pressing projects, thus putting it on the back burner of my mind.
One day I received an Instantpot, and the only place we had to store it was on top of the current pantry, which was hard for me to reach. This started bringing that project to the front of my mind again. Additionally, I had been thinking about an air fryer but was not about to purchase one until I had figured out where we could store it. Wouldn’t that built-in Elfa pantry be the perfect solution?
My only hurdle now was to get the hubs on board. I was going to need his blessing and help to build it. Now, if you know Travis, he isn’t quite as enthusiastic about home improvement jobs as I am, and to be honest, the current pantry wasn’t bothering him that much. My strategy became helping and encouraging him on the thing that was bothering him (the garage header) to warm him up for the pantry idea.
The garage header was a big undertaking and overwhelming at times, but that’s for another day. It turned out fantastic, and he received so many compliments from the neighbors that he was feeling confident in his home improvement skills. That was my cue to bring up the pantry idea. He didn’t jump on it at first, but he didn’t dismiss it either, and we started having conversations about how it might work, and that’s when the floodgates opened for me. Because if he gives me an inch on a project I want to do, I’m plowing through to the finish line.
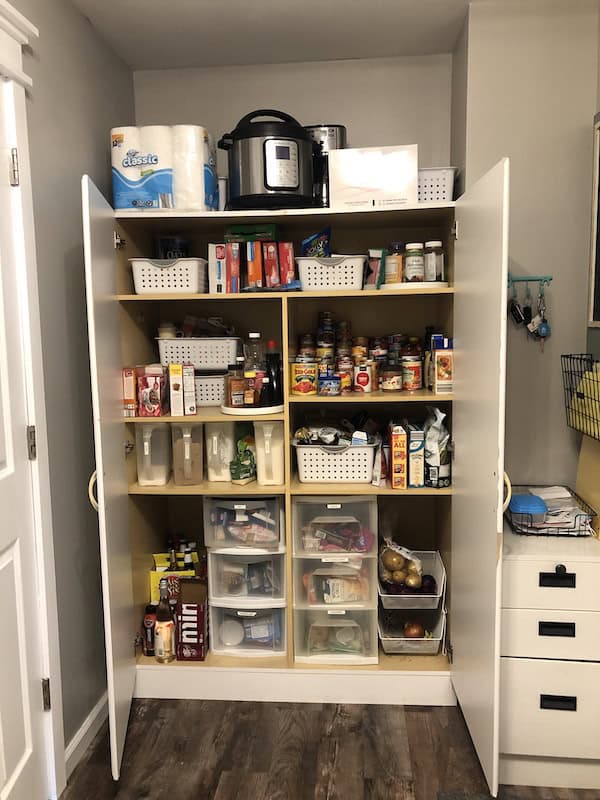
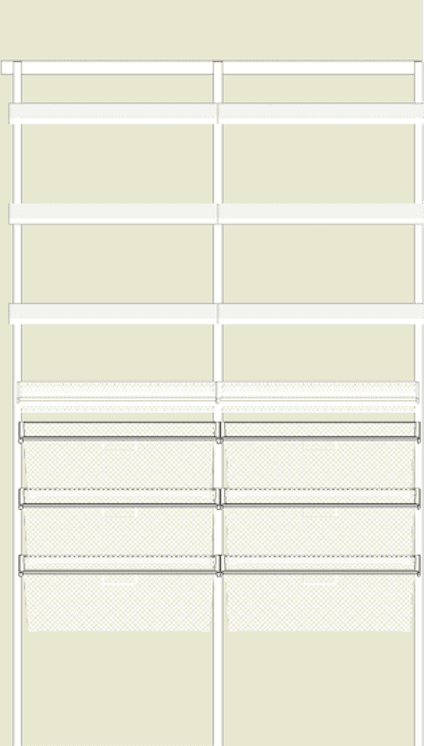
My next step was to do an Elfa design to envision the inside and sell him on it. I made sure to include an easily accessible spot for my current appliances and the air fryer I wanted. I also included my favorite Elfa accessory for pantries: the gliding tiered shelves for canned goods.
This is what the design looked like when it was complete.
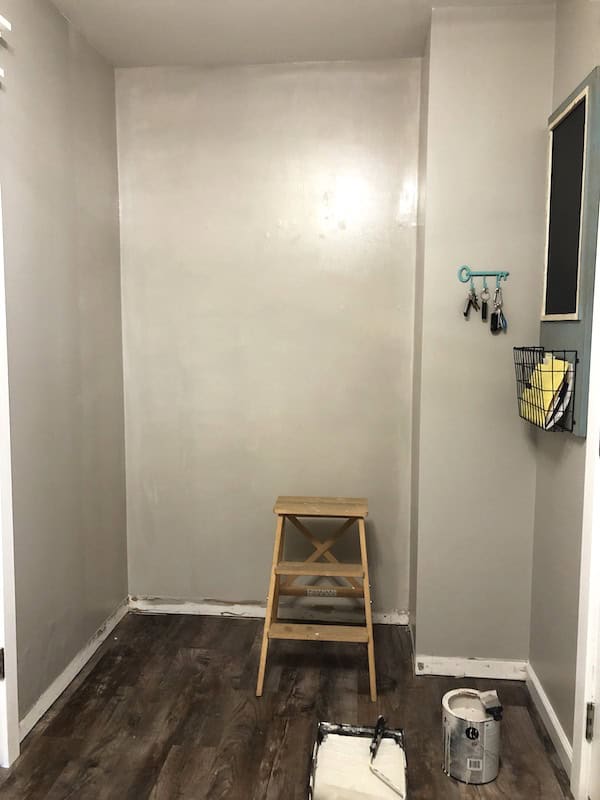
A few days before Labor Day, I mentioned to Travis that it might be a good time to tackle the project because it was a 3-day weekend. He didn’t say “no,” so I took that as a “yes.” Saturday morning, I got up and emptied the pantry.
![]()
He walked into the kitchen and said, “are we really doing this?” And now you have an idea of what it’s like to live with me.
I promptly listed that cabinet on Facebook Marketplace and had offers within minutes. Check.
Next, we began with patching the holes that had secured the pantry to the wall. Because Elfa is a wall-based system (meaning it will be secured to the wall, and you will be able to see the back wall), it seemed like we should paint the wall as well.
Now we had to decide how to build the frame. After removing the baseboards, we started with the pantry door frames. To accommodate our Elfa system, we needed to move the pantry forward just a tad, so we secured 2 x 2 boards on either side of the nook to the wall.
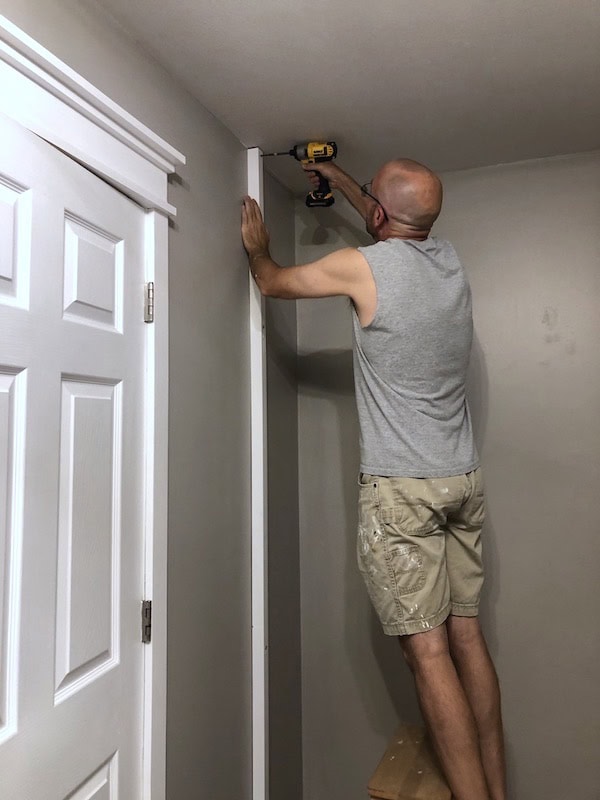
We then attached our 1 x 3 boards to the 2 x 2’s to create the frame. Oops. I almost forgot—we had to paint the boards first.
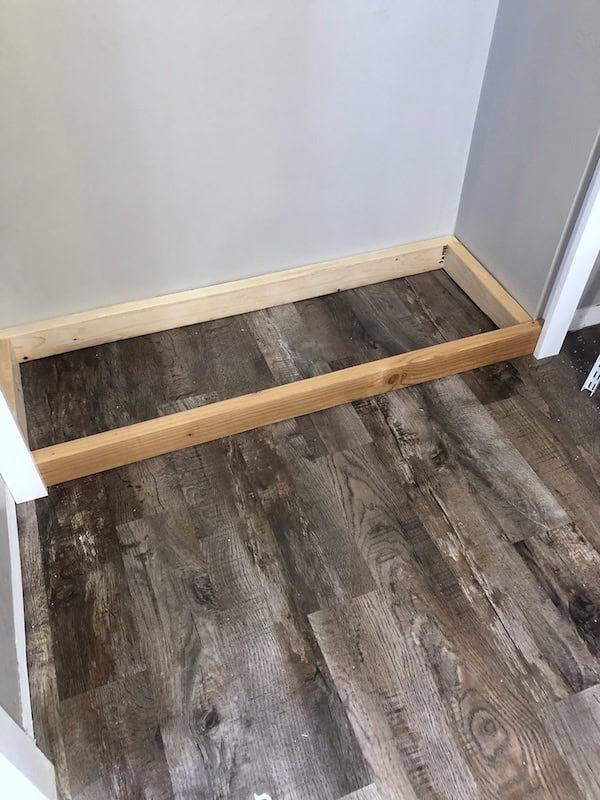
Next up was building a floor of the pantry. We used 2 x 4 lumber we found in the garage to create a rectangle frame for the pantry floor.
After the photo was taken, we added two more 2 x 4’s in the frame’s center for more stability. We attached a painted 1 x 4 to the front of the 2 x 4 for a finished look and then used a painted plywood sheet on top.
Our next challenge was creating a header. We decided to use brackets (side note—another thing to know when doing carpentry is that lumber is not named what it actually measures). So don’t get fooled into thinking a 2 x 4 is actually 2 inches x 4 inches. That would be too logical. Just saying I speak from experience. LOL.

In the midst of this painting, measuring, and building, I picked up my Elfa system from The Container Store. You can pay to have your Elfa system installed for you, but we chose to do it ourselves. First, we hung the track, on which the entire system hangs.
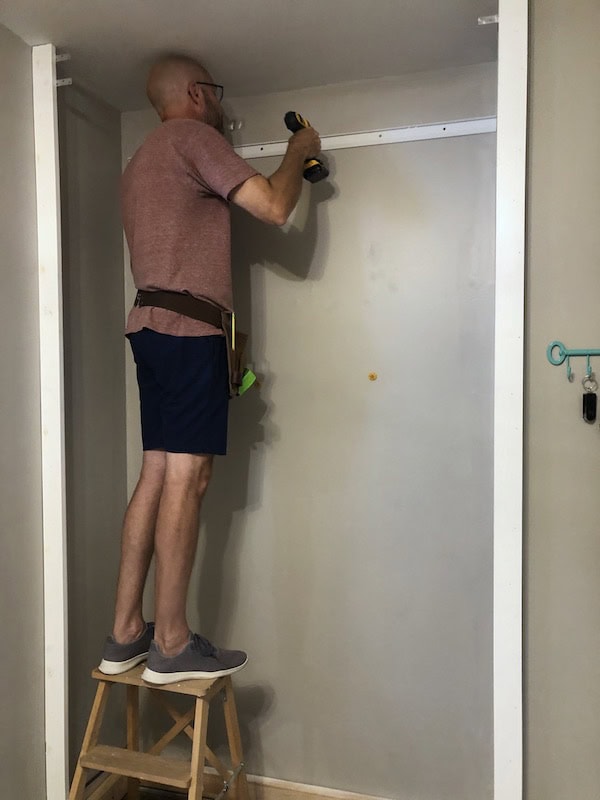
The standards are placed next.

Unfortunately, some of the Elfa items were on backorder thanks to COVID, so we put together what we could and decided to attach the header and think about how we would build the doors.

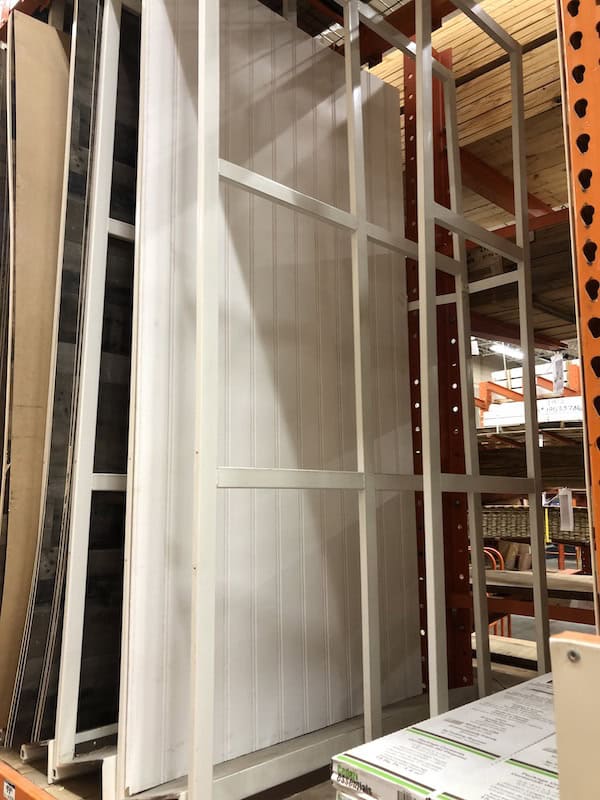
A trip to Home Depot aided in some inspiration for the doors. One large sheet of beadboard would be enough to be the base of the doors. Check.
Another big decision was deciding on hinges. Due to the tightness of the space, we needed hinges that would be on the outside as opposed to the inside of the doors. We decided on these hinges, which were designed for cabinets, and used 5 of them on each door because the doors were so tall.

We built the entire doors in the garage and painted them before attaching them. We chose to use 1 x 3’s to trim the doors for decorative reasons and add stability. By this time, you can imagine that I was drooling over my almost complete pantry.

Because the doors were so large, we found that using some lumber to hold the doors while attaching them was extremely helpful.
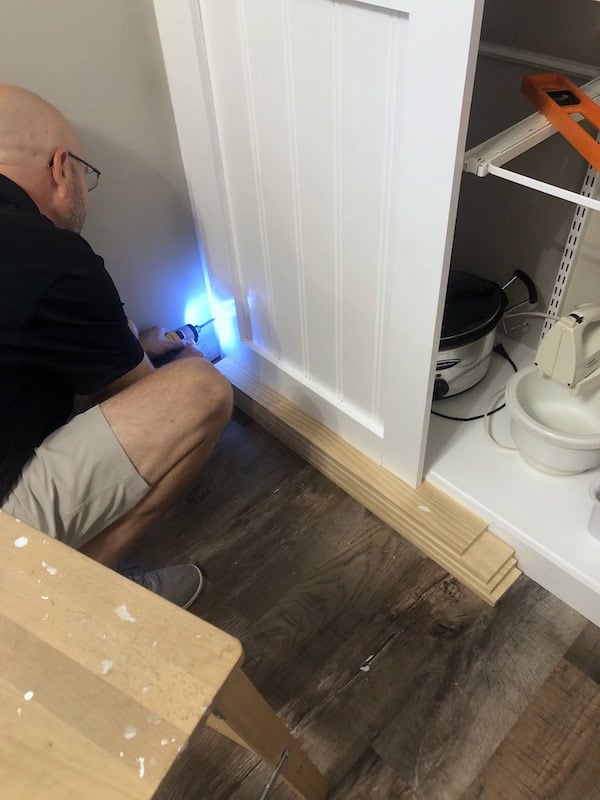
We also added handles that we liked. We used white caulk to fill in the gaps and seams between boards. The final step for the doors was to attach magnetic door catches at the top to help secure them when they closed.

The result: stunning!

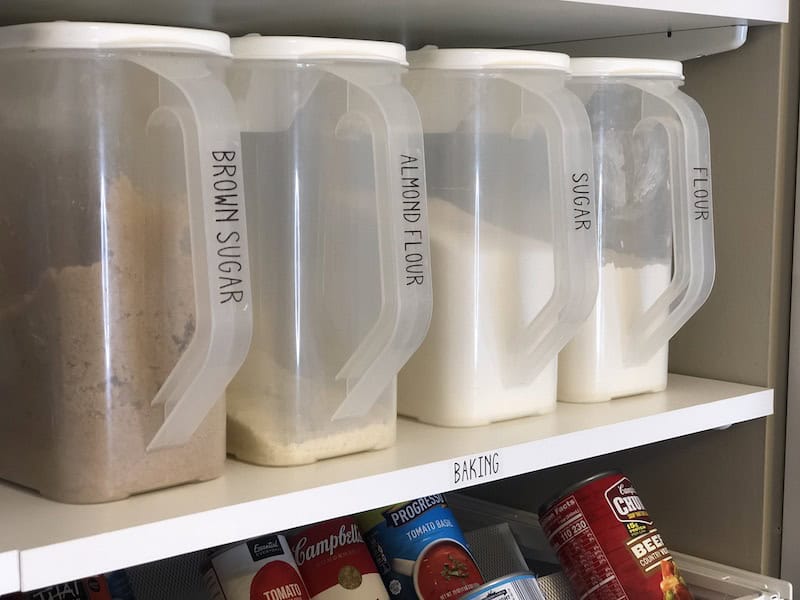
Now for the finishing touches on the inside, which included organizing and labeling. Squeal with delight here.


I can’t tell you how much I love my new pantry. EVERY. SINGLE. DAY. And when all was said and done, Travis said, “you know, I think this was your best home improvement idea yet!” That’s a win for me on both counts!
Do you live in St. Louis, MO, and are you ready to hire a professional organizer to help clear the clutter? Would you like to have a custom closet from The Container Store designed and installed for you? Call us today at 314-626-8558 and schedule a consultation.
Our professional organizing services cater specifically to individuals who want a hands-on approach and need someone to help them through a difficult process.
Our goal is to provide bespoke organizing services that help you achieve an ordered home so you can rest.

Our goal is to provide organizing services that help you achieve an ordered home so you can rest.
Perfectly Placed Professional Organization & Design, LLC
Wildwood, MO 63011
(314) 626-8558 | susan@perfectlyplaced.org
Professional organizing services for St. Louis, Missouri and surrounding areas including West County, South County, North County and central St. Louis. See our service areas.
© 2016-2025 Copyright Perfectly Placed Professional Organization & Design, LLC – All rights reserved.